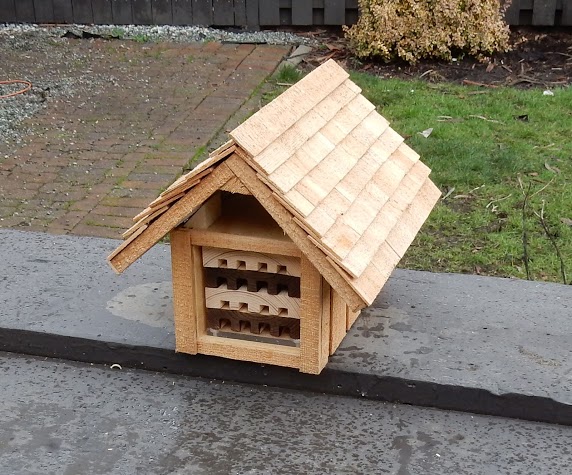
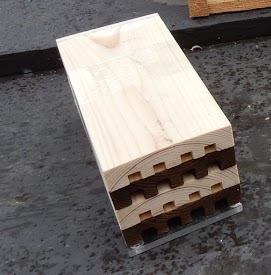
A Mini home for the Orchard Mason Bee. Designed to provide a very small foot print, perhaps in a garden or on a windowsill or post. This cubical nesting tray has 5 channels and 30 cocoons might be expected. This year I got 53 cocoons from one. Another model has 7 channels. The tray is easily removed to allow harvesting the Orchard bees, cleaning, and re-use for the next year. A parchment insert in the middle channel allows for removal and cleaning. The roof is attached with velcro, allowing the overhang to be adjusted back in spring when the weather is cool and forward in the summer heat.
The main box is constructed with 1/2 ” plywood and covered with strips of Western red cedar. The detachable roof is 1/4″ plywood covered with a cedar shingle. The west coast rain won’t hurt this guy.
If the channels get filled up quickly, the nesting tray can be put in storage and an empty one easily inserted .
Did you know: The Blue Orchard Bee is also know as “Osmia lignaria”.
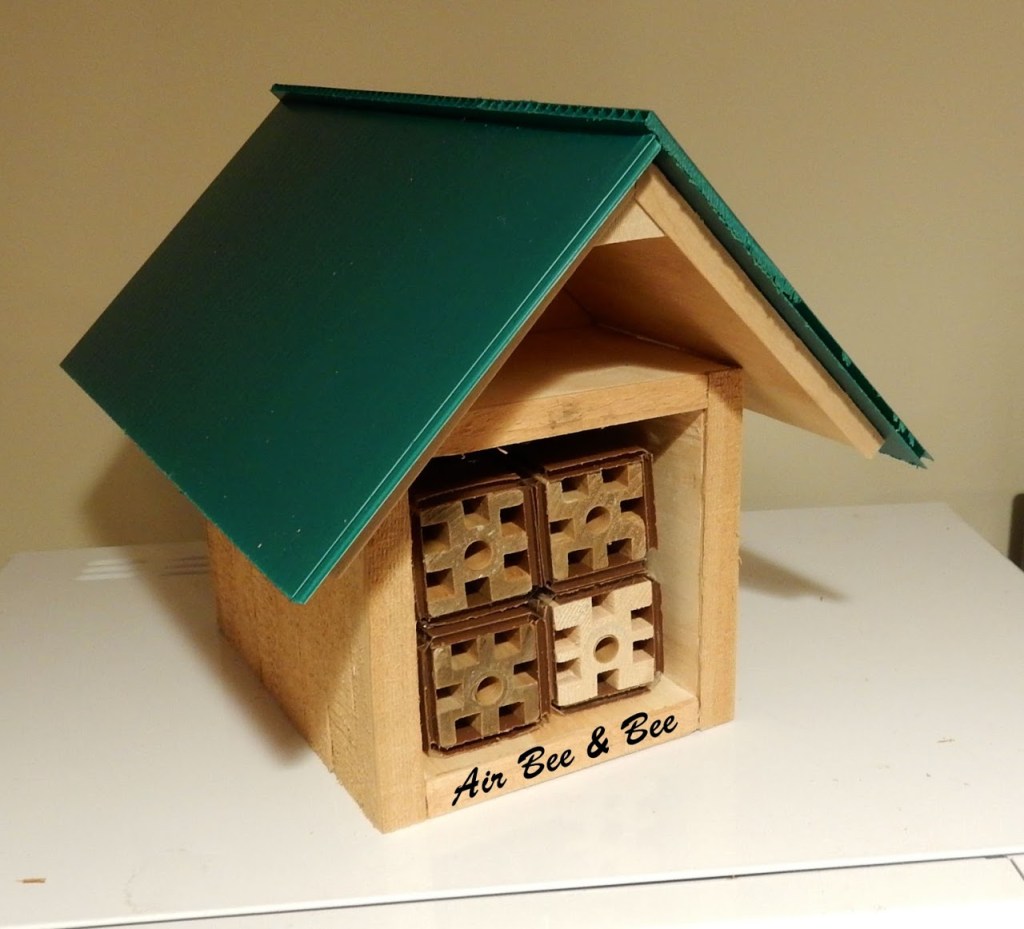
The “Cottage” incorporates four trays, each having 4 nesting channels. This would require approx. 16 cocoons, 9 males & 7 females. A good return would be in the order of 112 cocoons. The dark trays have been torched to give a darker surface, which allows the bees to better distinguish which channel they are working on. A plexiglass sheet on the bottom of the trays allow a view of what is happening in real time. There is ample room in the “attic” for a hatching box.
The main box and roof is made of 1/2 inch plywood, and covered with thin strips of western red cedar. This should give a long lifetime in any weather climate. The entire roof is attached to the main box with velcro, making it easily detachable. This allows the overhang over the front to be adjusted. Less overhang in early spring will allow greater heating from direct sun to enhance hatching. In the heat of summer more overhang will protect from overheating.
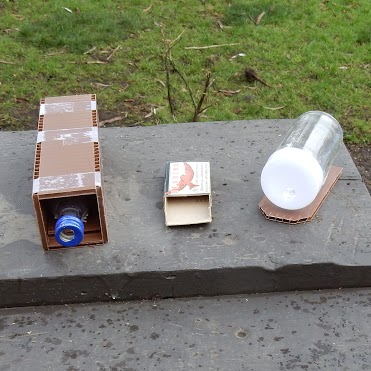
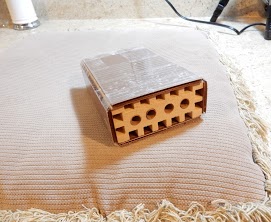
Hatching the cocoons. The cocoons are taken out of the fridge when the outside temperate reaches about 55 degrees (13C) in early spring . If you want them to pollinate a certain plant or tree, put them out when the flowers are just beginning to open. The cocoons can be placed in a box, bottle etc. in or near your Mason Bee home. The aim is to protect them from predators and the elements until the bee emerges from its cocoon. Suppliers often ship them in a small box (matchbox) which can have its end opened to allow them to escape. A better way is to transfer them to a small bottle with a 3/8 inch opening in the lid to allow the bee out. In the example a salt shaker bottle (3 for $1) from a dollar store is used, or a 2 oz. liquor bottle or drug canister. Any of these can be attached with velcro to prevent them from moving around. Remove the hatching vehicle once all the bees have emerged. The examples shown can be attached to the outside of the Mason Bee home with velcro if necessary.
One of the examples shown utilizes corrugated plastic to form a box to house the bottle. This can be efficient when using cube nesting trays in your Mason Bee house.
Orchard Mason Bee Nesting trays. Traditionally a board with long grooves in which the Mason Bee lays its eggs and prepares them for life. The accepted optimal length is 6 inches, and this is important as the Bee lays females in the back of the channel and males in the front, slightly favoring the males in number. A channel that is too long or too short may disturb this ratio. The accepted size of the channel is 5/16 inch. This allow the Bee to work and turn, but limits the amount of mud required to separate her offspring, giving her more time to produce new eggs.
Commercially produced trays are available, generally about 6″ long, 4″ wide and 3/4″ thick. They usually have 6 or more slots, 5’16” in diameter. By stacking several together a good size nest is achieved. A perfect circle (right) is likely the optimal, with an arched opening (left) being very close behind. A square opening (below) is a very close third. Less mud is required for the circle but the amount is not great.
Much argument is to be had over the material used for the trays. Wood is the most popular, but I have seen plastic trays full to the brim. Some argue Cedar should not be used, while some suppliers sell only Cedar and swear by their results. Its my own opinion that new wood should to aged at least a few months to rid it of strong aroma’s. In nature the Mason Bee often use holes bored by other insects or cracks in shrinking wood, so the wood is likely a few years old. I give my nesting trays a bath of very muddy water to darken them a bit and minimize the “new” smell.
Building Your own:
Start with 25″ or more length of wood, then cut all your grooves. Cut the wood into 6″ sections for the final product. This avoids working with small pieces of wood in high speed machines. Finally, carefully sand all the grooves so that all edges are smooth. I emerge the final product in a sloppy mix of garden soil and water (mud) for a couple days to darken it a bit, and to combat the “new” smell. Mason bees don’t like new.
Bee’s may not utilize the tray if the channels are open to the rear. Use thin plywood or heavy paper/cardboard to seal off the rear of each tray. Alternatively if you have a stack of trays, one piece can seal them all off.
Home made nesting trays are very cost effective. Cheap lumber grades, such as pine are fine, and readily available as 1×4 and 1×6. Anything wider may tend to warp. Used wood is fine, in fact older wood will have less “new” wood smell. Try and pick pieces that have vertical end grain to prevent warping.
The slots can be cut with a table saw, although this takes very careful measuring and care to get the 5/16″ openings properly spaced. I use a router and router table with a 5/16″ square end bit. A “bullnose” bit would be preferred to give an arched opening, but I have been unable to find one.
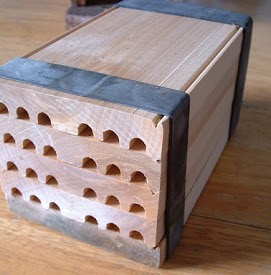
In the above example to the right, the 2 dark trays were burned with a blowtorch. Might be effective, but overkill. A 3/16″ plexiglass sheet was added to the bottom so the progress can be viewed from time to time. Normally any thin sheet of wood, plywood, or coroplast can be added to the bottom to seal it off.
Alternative Nesting trays
A problem with traditional nesting trays is that they tend to warp. The wider and thinner they are, the greater this problem. For example a 1 x 6 will warp easier than a 1 x 4. A 2×2, 2×4 or 4×4 tend to have the least warpage.
2 x 4 with 18 channels
2 x 4 wrapped with choroplast
The tray on the left demonstrates the warpage problem. The 2 x 4″ tray on the right is much less subject to warping and also inhibits the travel from one channel to another. It would be wrapped on all 4 sides with coroplast. The round holes in the middle must have paper inserts, which you can roll yourself.